
How to Make a Wood Bow Tie Joint--Dutchman Joint Construction
Making the jig,
In this tutorial I will still show you how to cut a perfect bowtie with my favorite method. While there are quite a few ways to cut a bow tie joint, my go to method is using a bandsaw and a shop made jig. Some other methods worth looking into are using a router with a jig or using a table saw. I won’t go into the specifics for those methods. Because my method is obviously the best (debateable). But if you don’t have a bandsaw, that’s where I’d start. What you don’t want to do is freehand cut one with your bandsaw, jigsaw, or handsaw. Unless you want it to look like a kindergarten project only your mom will appreciate.
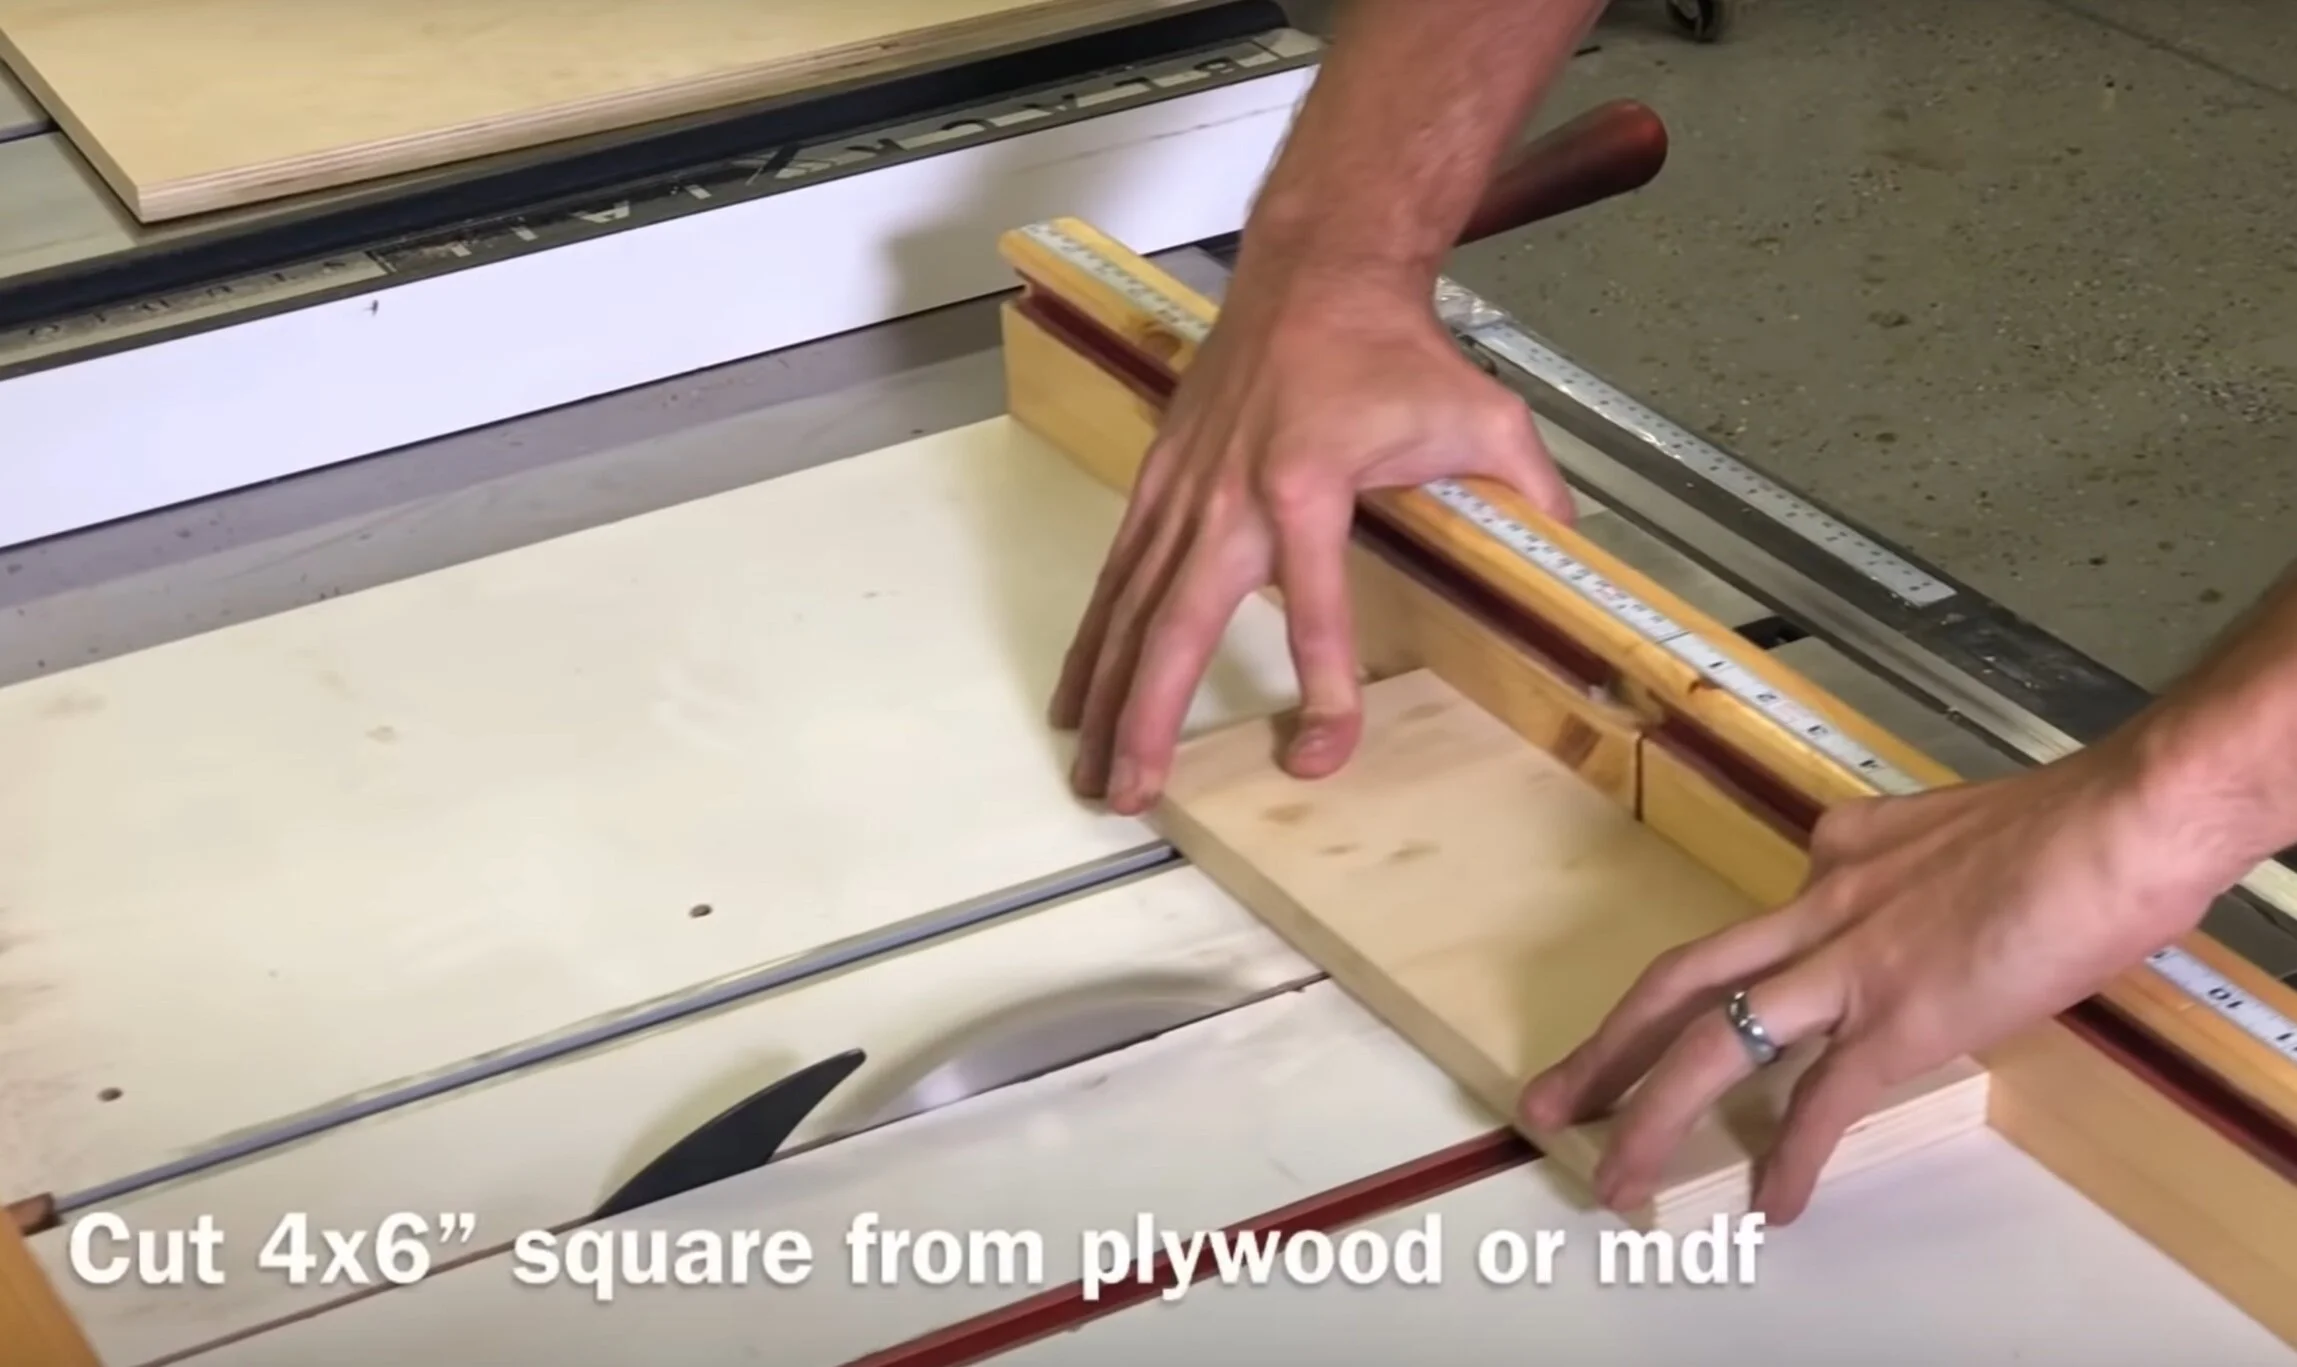
To be clear, I didn’t invent this method. But I’ve tried quite a few different ways, and this is my favorite. The main piece of this jig starts with a simple piece of plywood or MDF. So first thing you need to do is cut a rectangle about 4x6”.

After you have your rectangle cut, you are going to want to take it over to your bandsaw. For this part you will need a shop built sled or at least a fence. If you don’t have a bandsaw sled, now is a good time to spend an hour and make yourself one. I use mine most of the time I’m using my bandsaw. Using your sled or fence, cut a perfect 90 degree notch out of it removing about 2x3”.
Next step is to go over to your miter saw. Using your factory angle indication on your miter saw, slide it over to your desired angle. This angle is going to determine how steep your bow tie angle is. I like a 7 degree angle for a nice slim tapered bow tie. 9 degrees will give you a steeper, more traditional bow tie. Since this jig is so easy to make, I have three jigs. 7, 8, and 9 degrees. You might be aware, your factory indicator is just an estimate of the angle, but since it is an arbitrary angle for us, it doesn’t have to be precise.
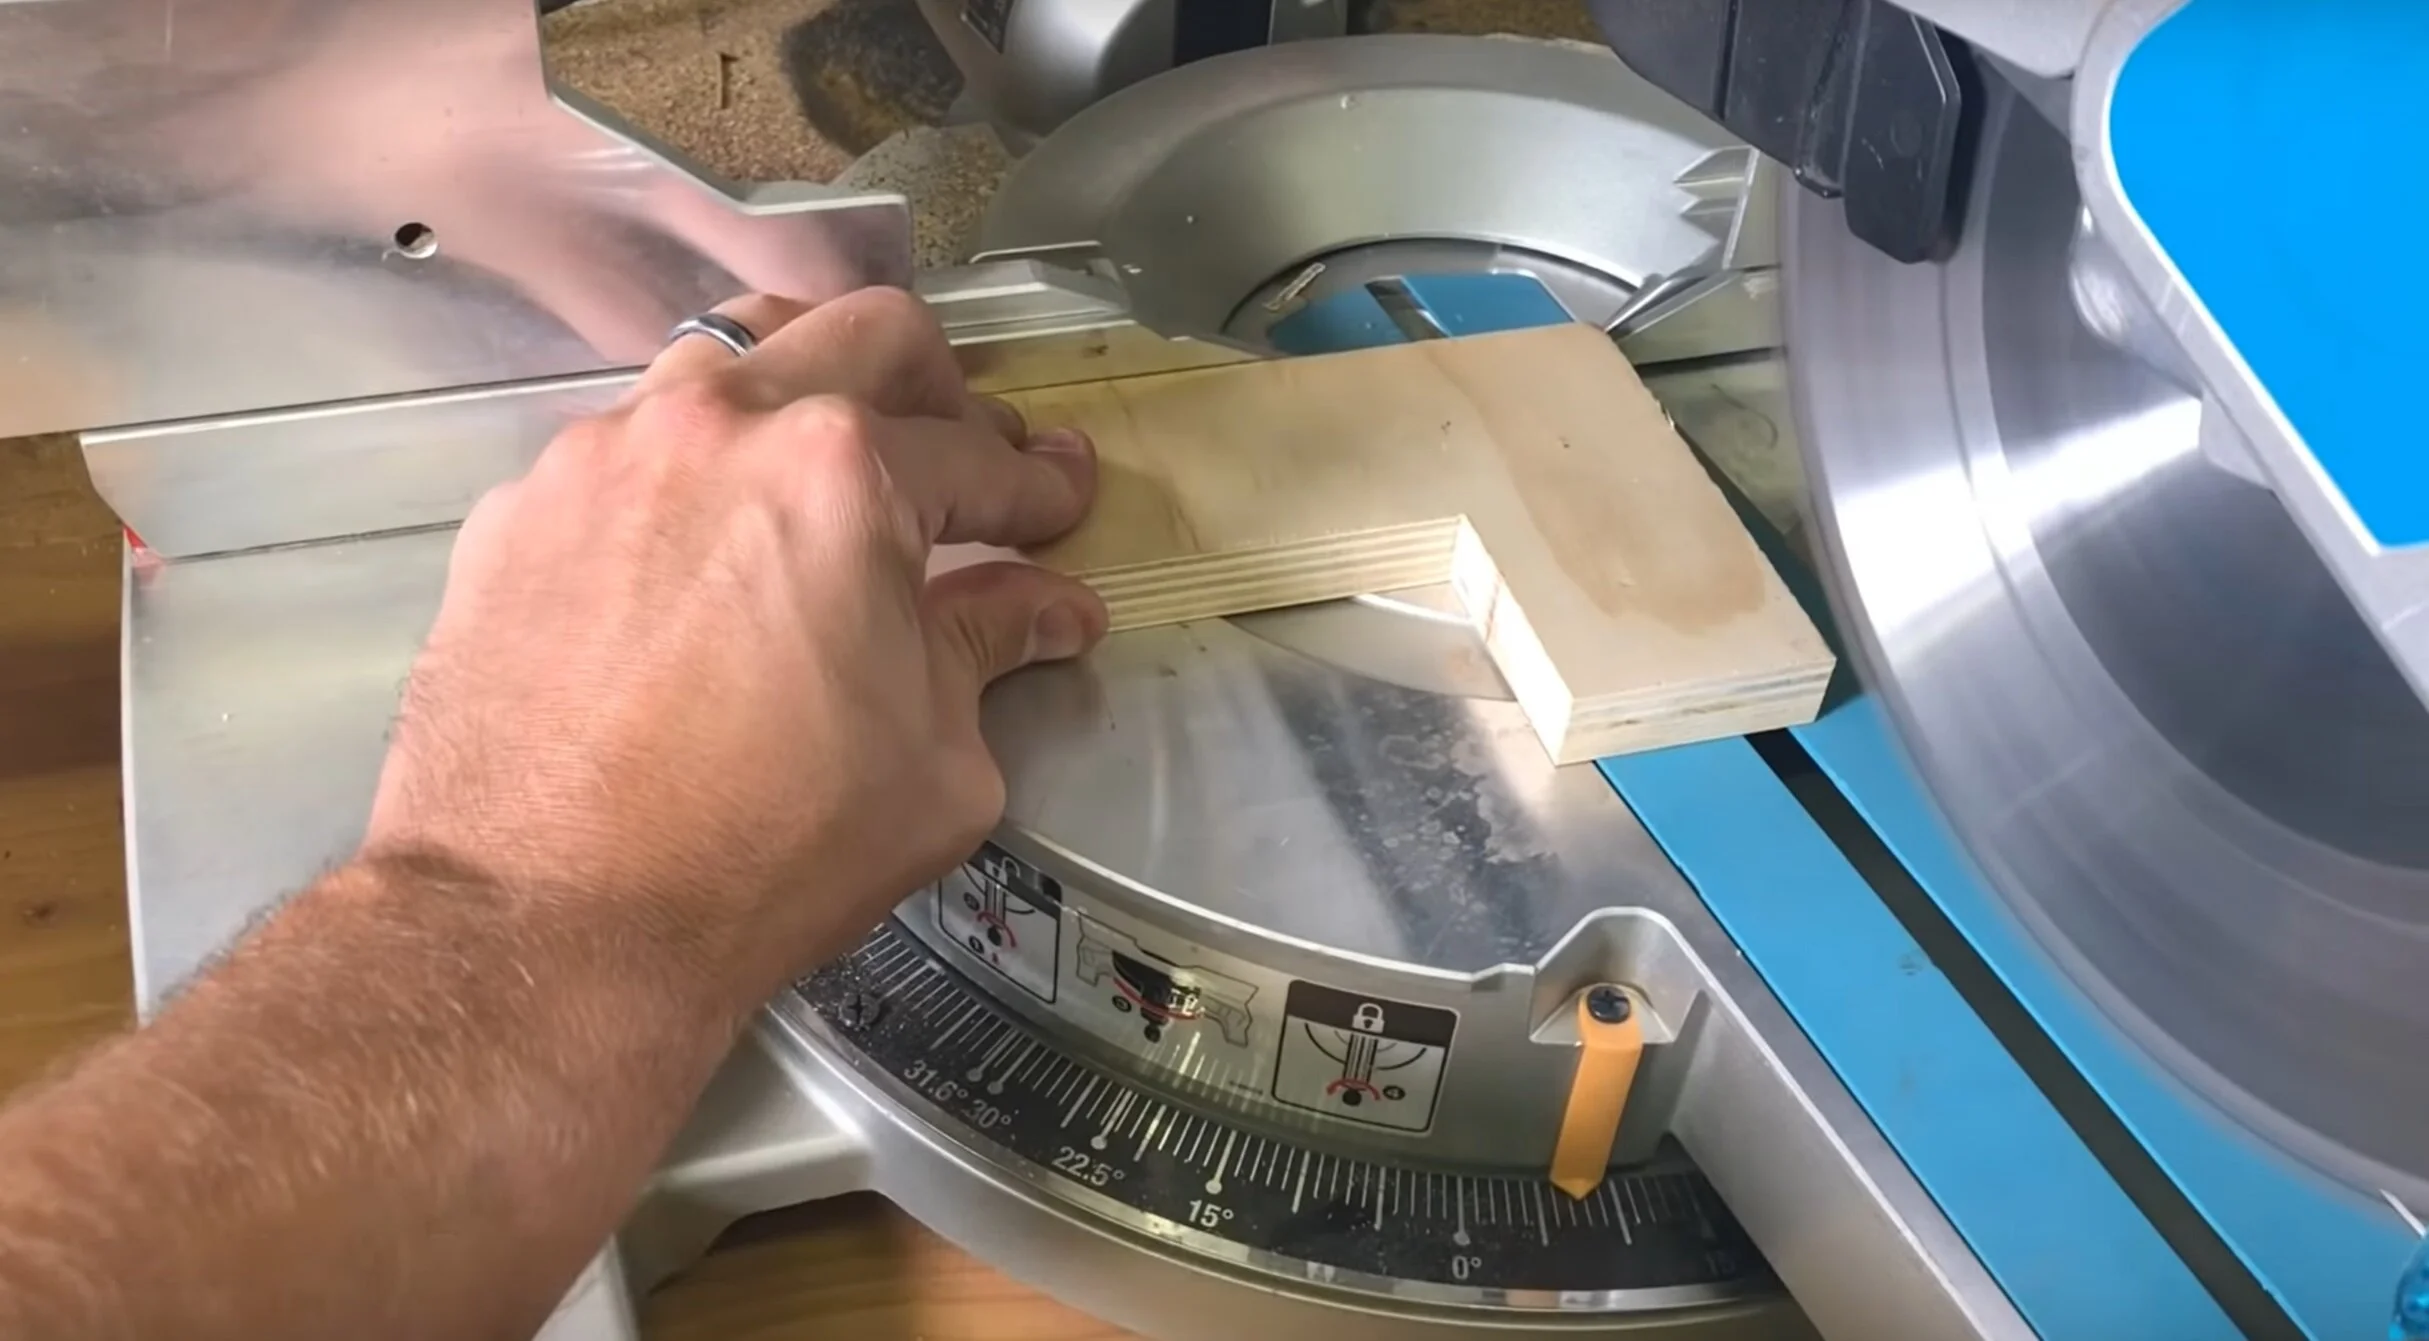
Lining up the 7, 8, or 9 degree mark

Cut straight down
9 degree bow tie
7 degree bow tie
Using the jig
Now that you have your jig made, you are ready to cut some bow ties! A tip I can offer when you are choosing how many bow ties to use and how long and how wide to make them. Is to cut some mock bow ties out of posterboard. That really helps me visualize how many to use, and how big they should be.
Most of my bow ties are around 1.25” wide and 4” long. So we’ll use that as our example. To start, all you need to do is cut some pieces of wood 4x1.25” (duh). Next you need to mark a line exactly in the middle of the piece. So in this case, exactly 2.”
Careful not to cut too far
Now set your jig on your sled, and set your piece of wood in your jig. You want the very corner of your wood to just catch the bandsaw blade. Holding everthing firmly in place, slowly slide the sled forward. You want to just barely hit your center line. Its better to be just short of the line vs being over the line.
After you make your first cut, flip the wood over and cut until you meet your first cut. A little short is fine. You can break off the piece if need be and clean up with a chisel. Repeat these steps for the other side. When you’re done you should have a pretty good bow tie. If you didn’t quite meet your cuts up, that’s totally fine. I usually don’t. You can easily clean it up with a chisel.
Ok, what now?
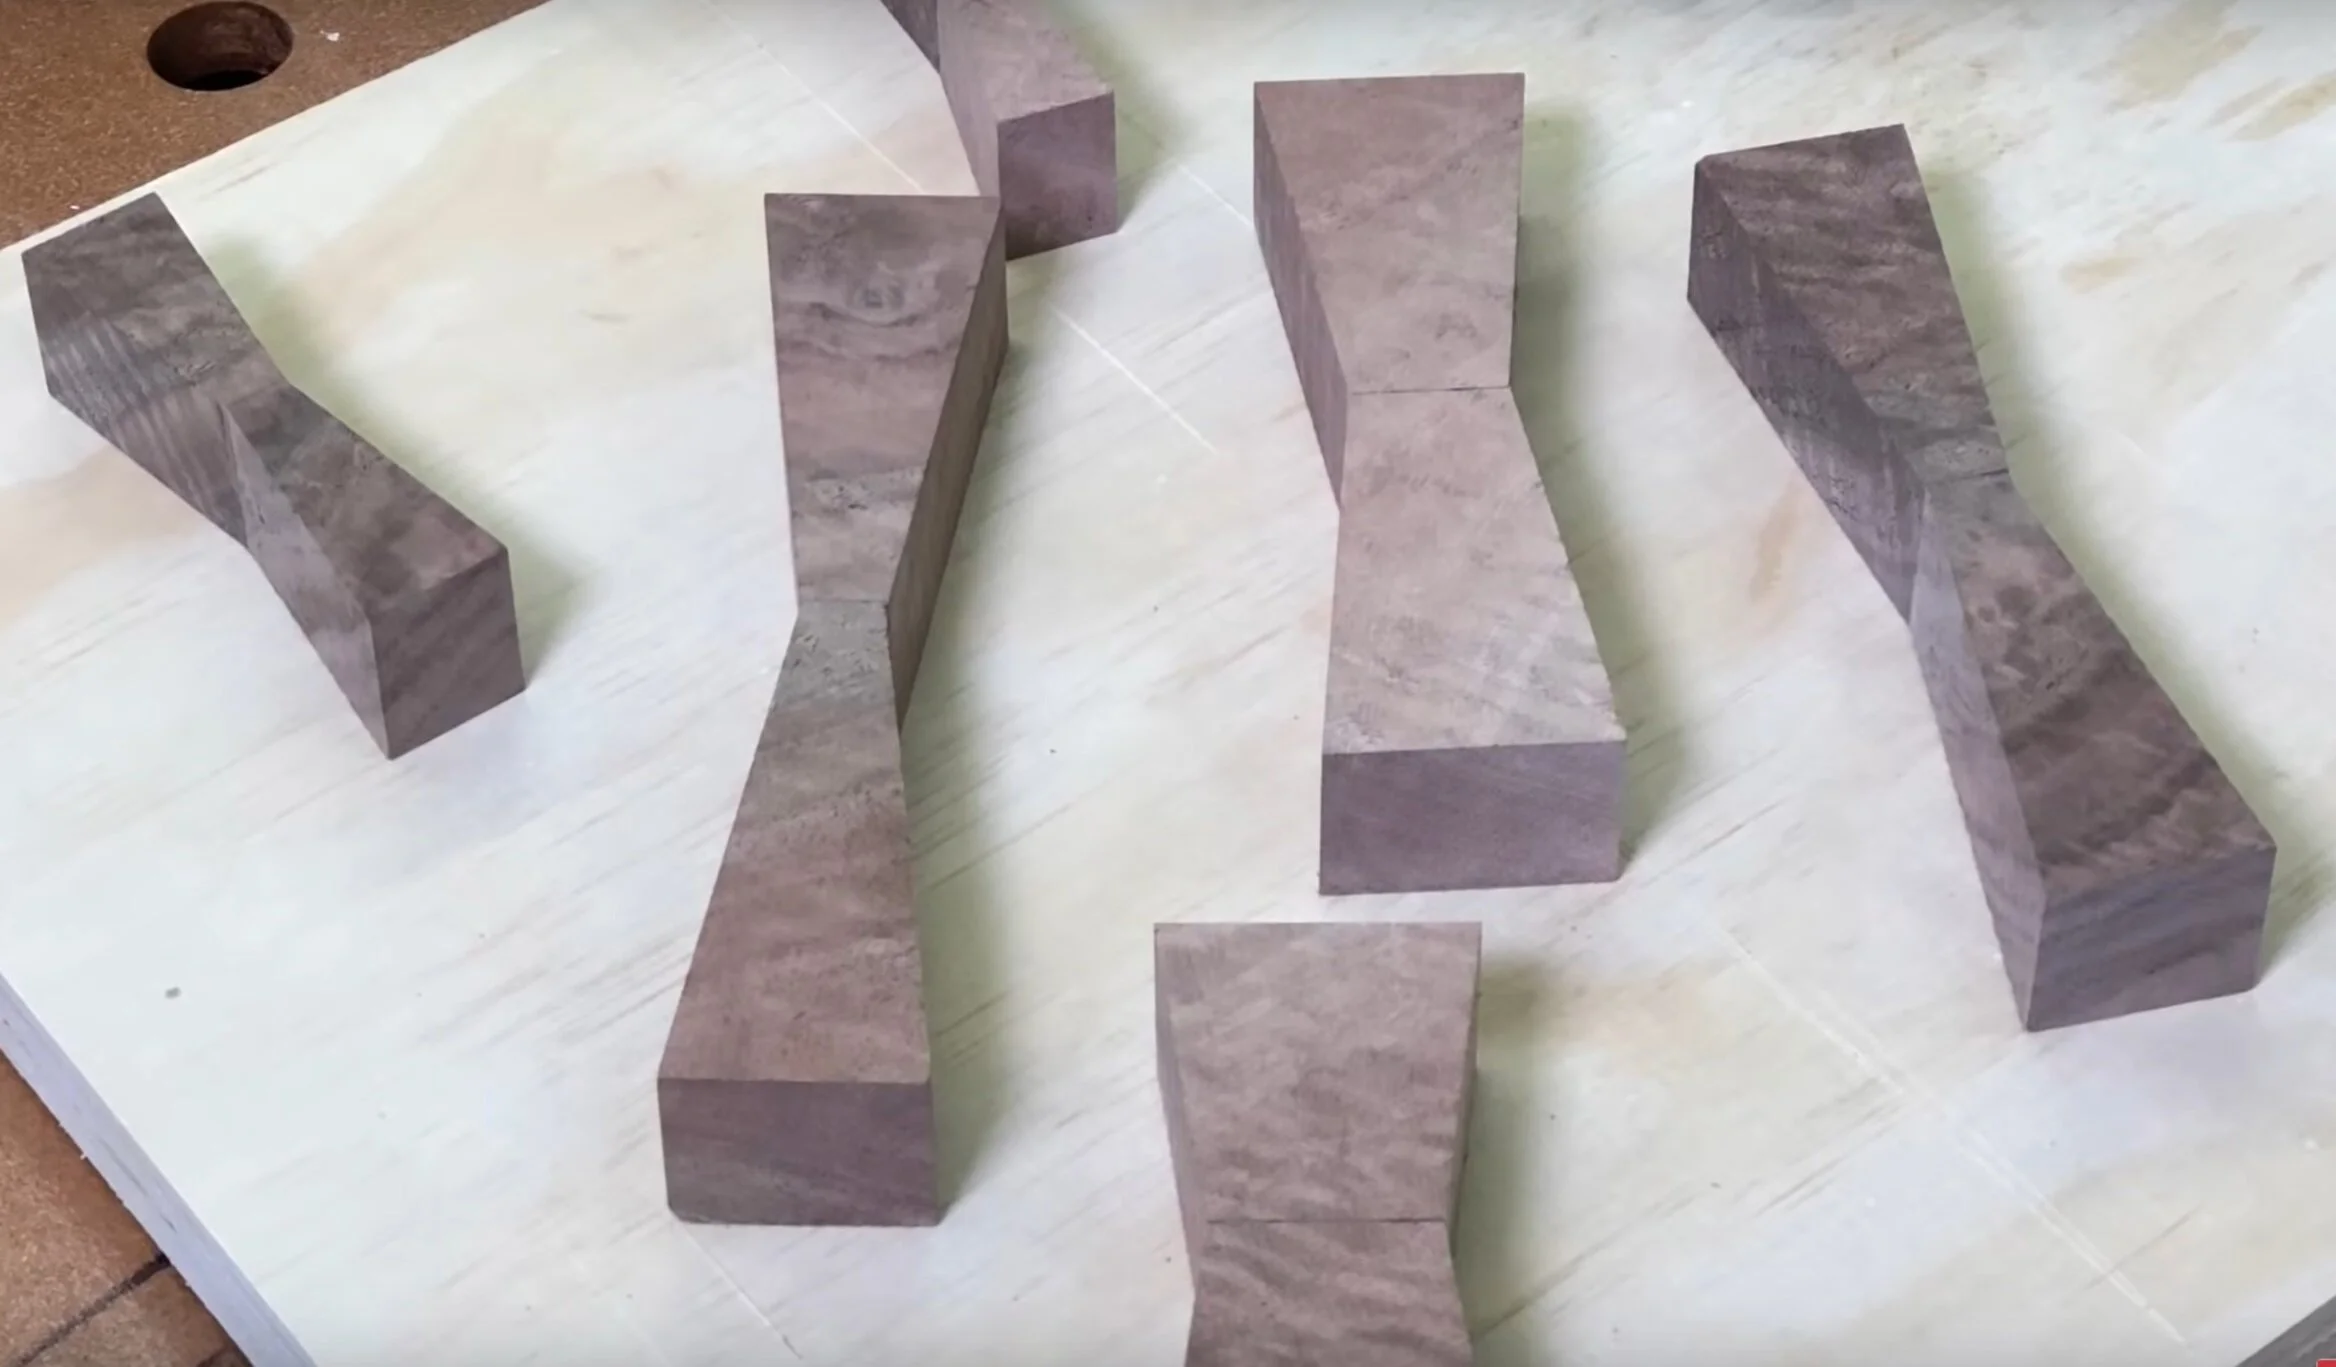
All made from the same jig
Ok, now you have one, or maybe a stack of bow ties to inlay. Now you need to make a hole that fits that bow tie just right. If you aren’t sure how exactly how to make that hole, check out my article on how to inlay wood. It really isn’t as hard as it looks if you haven’t tried it before. And if you’re a more visual learner, I have a video option as well.