
How To Make an Epoxy Resin Mold
How to make an epoxy resin mold for a resin table
Decide the desired finished size of your table.
Add 1-2” to the length and width.
Cut your form base from 3/4” melamine.
Cut sides at least 1” taller than your wood thickness.
Assemble melamine form with fast dry caulk
and brad nails or screws.
Add caulk to every seam, inside and out.
Let cure overnight.
Spray form with mold release. Buff in with
paper towel or rag.
Enjoy stick-free epoxy pours.
Tools and materials
choose a table size. Then make it bigger.
The first thing you need to do is pick a specific table size you like to end up with. I have made dozens of tables and still find it best to make each side 1” longer than your desired finished size (2” overall longer and 2” wider). This is to account for inevitable flaws that pop up. Flaws could be staining on the endgrain from the epoxy dye, a low spot in the epoxy from not being perfectly level, or any number of things that can pop up. I will sometimes go as small as .5” bigger on each side (1” longer and wider), but that can be cutting it a little close if you absolutely need to hit an exact size.
For an example, my most recent table needed to end up exactly 84x44”. So I made the inside of my form 86x46”.
what to cut first

I always make my forms with the sides mounted on top of the base. Opposed to attached to the side of the bottom piece. This is for a few reasons. First, I like a smooth bottom. Free of anything that might affect it laying level. Second, I like to be able to visibly see every seam. In the unlikely event of a leak popping up, I want to be able to see where it is coming from. So I can hopefully stop it. If the sides weren’t mounted on top you would only see a pool of epoxy seeping out underneath. Without being able to do anything about it.
Since my table was going to finish at 84x44”, and I was making the form 2” wider and longer, AND I’m mounting the 3/4” sides on top, my first piece will need to be 87.5x47.5” (84+2+.75+.75=87.5).
Tip: Get Home Depot to cut your base piece with their panel saw. Tip for the tip: Monitor their measurements closely. They don’t care as much as you.
cutting the sides
Cut your sides at least 1” taller than your epoxy pour. I generally cut all my sides at 4” though. Make sure you do your math when cutting them to length. 87.5” long and 46” wide. Since the 46 needs to sit inside the outer walls.
assembling your epoxy form
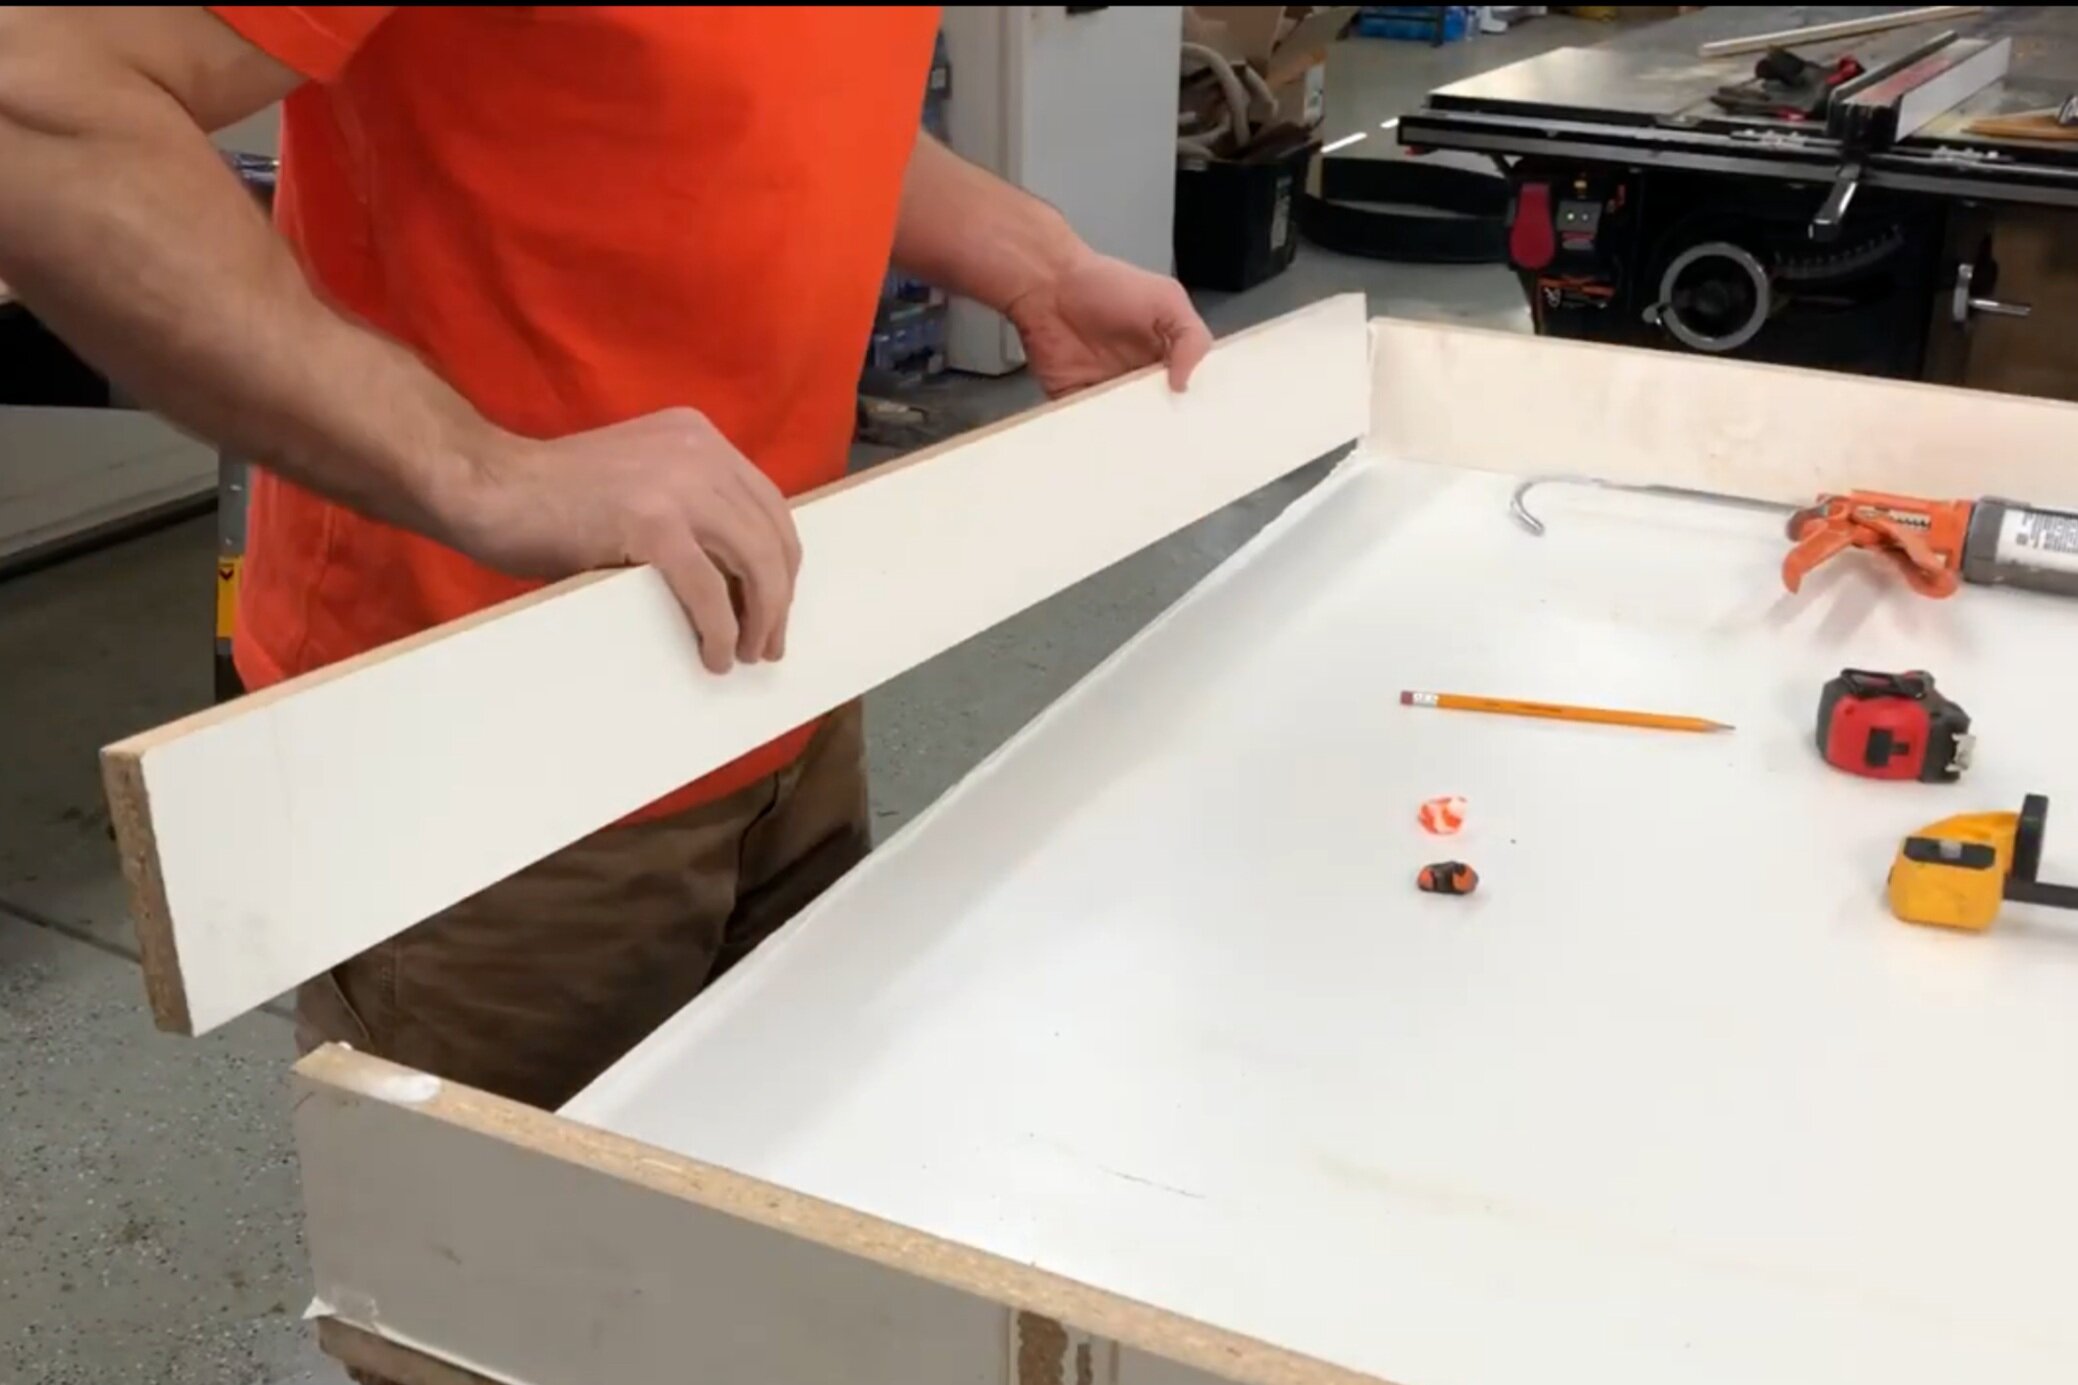
This is the most important part. Make sure to use fast dry caulk. Even if you aren’t in a hurry. Silicone or construction adhesive can actually work too well. Making it impossible to take your form apart when you’re done. The fast dry caulk will seal it water tight but still come apart easily. Add a bead between the sides and your base. Then brad nail or screw them (or both) together. Do the same for all four sides, and don’t forget the caulk vertically where you sides meet. Once all four sides are caulked and secured in place with nails or screws, go back and add a bead of caulk on every possible seam. Inside and out. Smooth the caulk out with your finger like you would a bathtub surround. Wetting your finger first will help it go a little smoother. After you are confident you table is aquarium tight, I highly recommend waiting 12-24 hours before pouring your epoxy. The caulk does say 20 min dry time, but I have actually sprung a leak trying to pour in the same day. So I don’t risk it anymore.
How to keep epoxy from sticking
You might have seen some makers cover their molds in Tyvek or Tuck tape to prevent the table from sticking to the form. This is an effective method, however I no longer do it myself. The first drawback is that it takes forever to cover an entire form in tape. Second, the tape is actually quite expensive. Finally, the taped bottom leaves a ribbed surface after your pour. The advantage is that the taped pieces can generally be reused over and over. So if you made the same sized table a number of times it might be worth the drawbacks.
Instead of Tyvek tape I use mold release to keep the epoxy from sticking to my form. The mold release I use will work with any epoxy. Even if an epoxy company says you have to use their particular brand mold release. The main drawback is that this mold release spray comes out extremely airborne. So make sure to cover all your wood with a drop cloth before you spray. I can’t think of a worse substance to get on a piece of wood before an epoxy pour.
Spray your mold release back and forth like a grid over your entire form. Don’t forget the sides. I will let the mold release set for a couple minutes, then use a paper towel to wipe the whole form down. This will remove any excess spray, and fill in any areas you might have missed. You can go back and do a light second coat of spray if you’d like. But I generally have success with just one good coat.
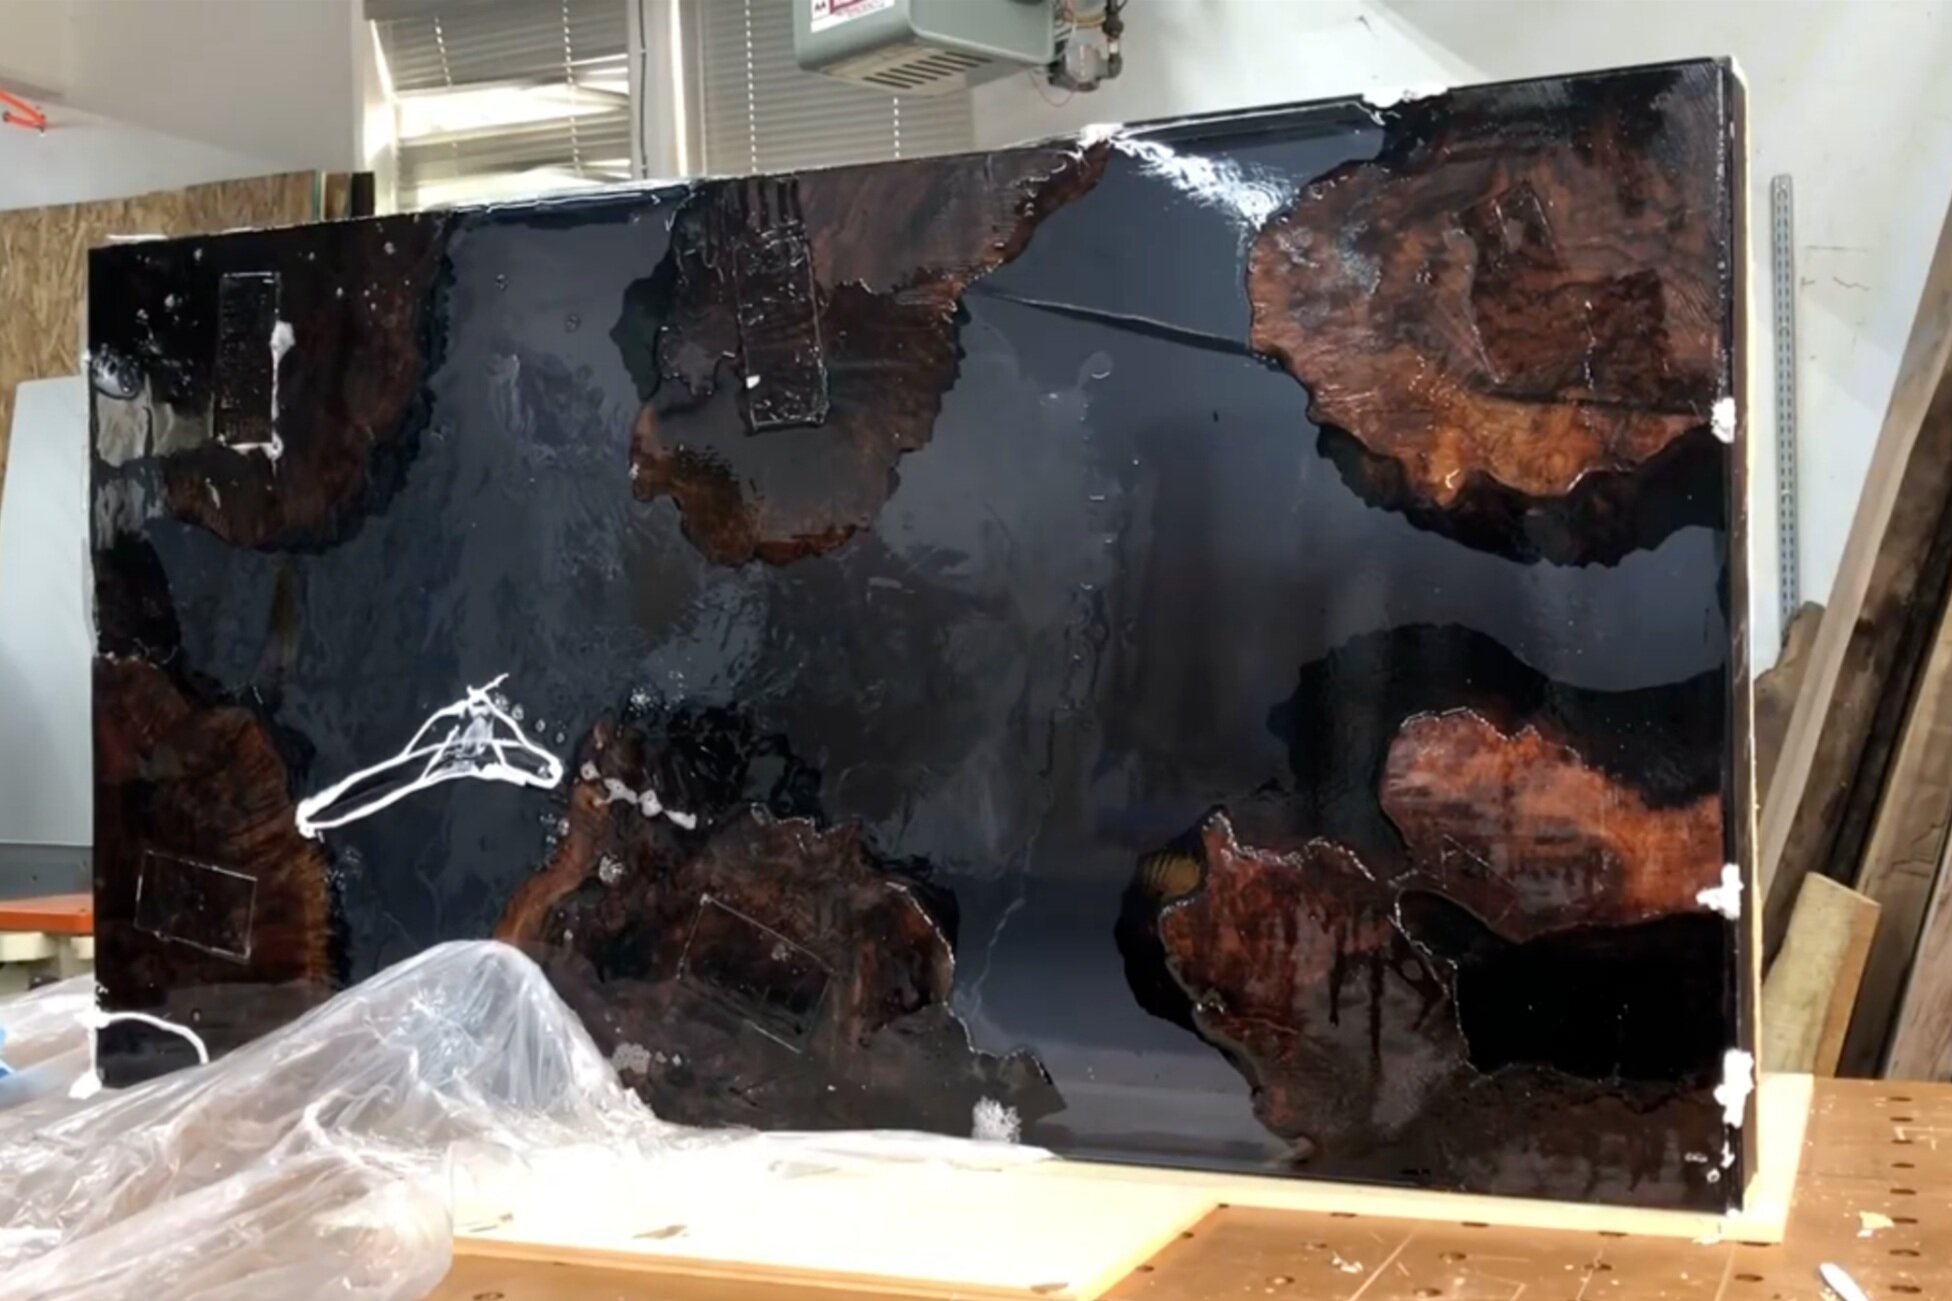
Pour your epoxy!
I have a detailed blog and multiple videos on how to make an epoxy resin table from start to finish. So feel free to click here for a step by step guide. Or check out the video for a more visceral experience.
removing the table from the mold
This part is easier than you think. Although I have a couple tricks that will help. First, remove any screws if you used them. Don’t worry about brad nails though. Now just give the top of the side a good smack with a deadblow mallet away from the table. Work your way down the length, hitting it every foot or so. If it doesn’t break free immediately, no worries. Just repeat the deadblow hits a few times and it should pop right off.
Once you have the sides free, the last thing you need to do is free the top from the base. I have found using a number of wood wedges works best. Just pound one in at a corner, raising the table 1/8” or so. Then pound another wood wedge in 6” from the first. Then again 6” from that wedge and again until you get around the entire perimeter. Oh, and you don’t need 100 wedges. Just play leapfrog with four or five of them. Once the entire perimeter is free, the base should pop right off the table top.