
How to Sand Wood, Properly
This was going to be a continuation of my “Live Edge for Beginners” series. But I decided this topic should be a little more all-encompassing. Sanding wood doesn’t just apply to live edge, in fact it almost always doesn’t apply to live edge. The good thing is, the same principles apply to an 18’ Bubinga slab that apply to sanding that old Oak breakfast table.
Our Starting Point
For the purpose of this article we are going to assume you are starting with a nice flat piece of wood or wood slab. If you’d like more info on how to get a live edge slab perfectly flat, check out this previous article I wrote on that topic. If you are in the process of refinishing a table, it should have all the old finish removed prior to this point. No polyurethene, shellac, lacquer, hardwax, or other type of wood finish. Just good dry wood.

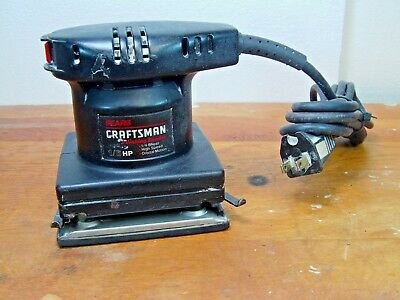
$49 Botsch sander is a great value
Tools Required
Random Orbital Sander Bosch or Festool are what I’d recommend
Pencil
Sandpaper (more details below)
Vacuum for sander (optional)
I am fortunate enough to have a job that requires me to have some very nice ( and often expensive) tools. I understand that is not the case for the other 99% of woodworkers. So I will always include the best tool option in addition to a totally decent tool option. While the “best” option is often prohibitively expensive to most, the “totally decent” option will be a much more affordable tool that will still give you excellent results. Often times the main difference from the expensive tool and the cheaper tool is the time it takes to complete a project. Not necessarily the finished quality.
I know grandpa gave it to you for free, but its time to move on.
At an absolute bare minimum I am going to require you to buy a random orbital sander. You can buy a totally decent Bosch 5” orbital for around $49. Long gone are the days of folding your square sheets of paper into that weird square vibrating thing they called an electric sander. And even longer gone are the days hand sanding with a rubber block and sheet of sandpaper. Don’t fight me here, go buy an orbital.
If you want the BEST option, check out the Festool ETS EC 150/3. At around $500, it’s not for tourists. But I will say it makes the most tedious part of woodworking much more enjoyable. Ok, maybe tolerable is a better word. If you want some inside information, I just learned the ETS EC 125/3 is actually the same sander, and $100 less than the 150. It comes with a 5” pad, but can accept the 6” pad from the 150. But the 150 can’t take the 5” pad from the 125. I owned both when I learned this and didn’t believe it. I compared and everything checks out. Even the 400w power rating. If you go the Festool route, you are going to want a variety of pads, ranging from soft to firm. So purchasing the 125 is kind of a no-brainer if you only want to buy one sander. I also have a Festool vacuum hooked up to my sander. Which makes for essentially 100% dust free sanding. My lungs thank me, and yours will too if you can afford another $700 for a glorified shop vac. I’m mostly joking here, they are actually an amazing vacuum. In addition to being HEPA certified, you also plug your sander (or any tool) directly into the vac which starts automatically when you start your tool. It even continues to run for a few seconds after you turn your sander off. Ensuring all the dust in the sander and hose gets removed.
I’ve compared expensive tools to a heated steering wheel. If you live in California and temps rarely drop below 40F, you probably don’t need to spend $800 for that upgrade. However, if you live in North Dakota that $800 steering wheel might be your favorite part of the car. Similarly, if you refinish one table a year in addition to some small house jobs, you will probably be perfectly fine with the $49 Bosch. If you are like me and work in the shop almost every day of your life, then $500 is small price to pay for the time saved and quality delivered. Lastly, you may be the person who just likes nice stuff. So if you live in California and want a heated steering wheel anyway, good for you! Buy that upgrade and that Festool sander while you’re at it. You don’t have to explain yourself.
Materials Required
First and foremost, sandpaper. You should know not all sandpaper is created equal though. Meaning, 220 grit from the the local box store won’t give you quite as nice of a finish as some better quality 220 from a woodworking store or online seller.
As much as I love many of the Festool tools, I’m not a huge fan of their sandpaper. I’ve had good luck with Klingspor and Mirka sandpaper. And for once, the better option is actually cheaper! Klingspor and Mirka are both significantly cheaper than Festool. While I feel the finish quality is similar, the Klingspor and Mirka both seem to last longer.
These artbins from amazon are an awesome solution for storing randoms disks.
Feel free to mix and match paper brands. you will need the following grits though
Hitting every one of these grits is the proper way to sand. It is also the only way i will ever sand. HOWEVER… is it absolutely necessary for you to hit each and every grit shown here?… That depends on the quality you expect out of your project. What nobody will likely tell you, the vast majority of you will be fine skipping 120, 180, and 320. And while the finish won’t be quite at a professional level, you will likely be pleased with the results. You should at least hit 100, 150, and 220 at a minimum. I wouldn’t skip any of those.
Can I Start Sanding Yet?
Yes you can. Well, almost.
Marking your grid to know where you have sanded and where you haven’t.
Before you start sanding, it is a good idea to lightly draw a grid on your work piece with a pencil. Don’t push too hard. Just lightly make sweeping passes to cover the entire piece. This will enable you to know where you have sanded and where you haven’t.
Now go ahead and start sanding with your 100 grit paper. Keep nice even pressure with your hands. But don’t push too hard. Let the sander do most of the work. It is key to keep the sander pad completely flat on the surface. If you rock it at all you can dig into small areas leaving little dips that are extremely hard to remove. You should also be careful when you get to the edges of your piece. Don’t get your pad very far past the edge, as this can round the corners slightly.
As you progress from 100 grit to your ending grit, each grit you sand with is more important than the next. Starting with 100 grit. If you do an insufficient job here you will still see the planer/CNC/belt sander marks in your finished table. If you don’t remove the 120 sandpaper scratches entirely with the 150 grit, those scratches will be left in your finished table. This continues through every grit. And as you would assume, the lower the grit, the larger the scratches.
Sanding With the Grain or Across the Grain?
Traditional woodworkers often say to only use your orbital sander running with the grain. I might get some hate mail on this one, but I feel that is a little antiquated and perhaps a remnant of the old days of hand sanding. I will make passes running with the grain. However I’ve noticed if I only make passes running the same direction, you can actually see the sanding path faintly in the wood after the finish is applied. So I try and make my patterns a little more random. A very good woodworker I know makes passes running with the grain on one grit, then makes his passes on the next grit 90 degrees to the first passes. Ensuring you don’t see any sanding tracks when he’s done. This method works very well for him, although I worry a little about any standard patterns like this. So I tend to make more circular patterns with my sander running both with and across the grain in a more random pattern. When I change grits I will also start in a different area of my piece than I did with the previous grit. As you sand the grit wears down. So if you always starts and end in the same areas, there can be some inconsistencies across your piece.
If you think about the way your random orbital operates, sanding across the grain might not seem as bad. A random orbital spins, and vibrates ‘randomly’ as it runs. So even if you are sanding with the grain, that orbital is actually hitting the wood from every direction as it spins. I have even talked with Festool about this, and they confirmed when using an orbital sander it makes no difference.
Photography lights make the best shop lights in my opinion.
Light it Up
This step is pretty necessary, but sometimes I really don’t want to do it. It is extremely helpful to get a very bright light to aid in finding out how your sanding is going. A good shop light, or even photography light can work well for this. The reason I often don’t like doing this is that it can be very deflating to see the flaws in your sanding and have to go back and do it over. It is kind of like an aging model going on 4K TV with no makeup. No flaws can hide from the light. This is where you will see if you have missed any areas, if you dug your sander edge in on accident, those uniform passes with the grain, or any number of potential flaws you didn’t see without the light. Don’t get me wrong, its much better to find out now, instead of after you have applied your finish. You can probably imagine it is much easier to redo one sanding grit vs finish removal and all sanding grits.
Sanding, and sanding, and some more sanding
Keep drawing your grid with a pencil, and remove it with your next grit. Repeat the process for every grit up to your stopping point. The type of finish you want to use may determine how high you sand. This topic could probably be an article in itself. So I’ll keep it pretty basic. For my favorite hardwax finish (Osmo), I sand to 220 or 320. For a urethane or varnish i’ll generally sand to 220. For your sake, I’ll leave it at that. For now anyway.
I Hit All My Grits, Now What?
After you finish sanding with your final grit, thoroughly inspect with your bright light one last time. If you feel confident in the quality of your piece you are ready for finish. I have one last tip for you that might be able to save you some frustration. Wrap your piece completely in thin painters cling plastic until you are ready for finish. This is especially important for larger live edge slabs. The wood will absorb moisture from the air and cause the piece to warp. This can happen overnight and result in hair pulling frustration (why I’m bald). The thin plastic can prevent this from happening, saving time, money, and even hair.