
Baseboard Tips Nobody Talks About
I have installed what feels like miles of baseboards over the years, and until my last project, I am not sure I did a single one correctly. I decided that now was the time to up my finish-carpentry skill since I was about to install a few hundred feet of stain-grade Sapelle baseboards in my house. Still, for some reason, I couldn't seem to find a straightforward list of the tips and tricks that I can actually use for quality trim work. I spoke with several finish carpenters and scoured the internet for the most important tips and tricks to properly prepare for my big project. Now I share these tricks and techniques with you.
Stain-grade finish carpentry is much more difficult and less forgiving than standard paint-grade trim. There is no caulk to hide the gaps next to the wall and no Bondo to fill that outside miter that didn't quite fit. Basically, everything has to fit as it's cut. With a few exceptions that we'll talk about. All of that said, if you can do a stain-grade job on your paint-grade baseboards, they will look that much better. While most all of these tips apply to both paint and stain-grade trim. I will go over a few tips specific to both paint and stain-grade.
Tip One: Finish before you install
I'm surprised how often I see people attempt to paint their baseboards after installing them. The only time I would consider paint after installing baseboards would be in an unfinished house where I wouldn't have to worry about taping off the walls or floor. The same goes for stain-grade. I finished all of my baseboards with Rubio Monocoat (ironically, not stained) before making a single cut. Yes, you still need to touch up nail holes and seams with paint after installation. But it is far easier than painting the entire piece in place. Not to mention you can get a better finish by laying a piece flat to let the finish self-level.
Bonus tip: The best trim paint I have found is Benjamin Moore Advance. It leaves a sprayed-on look with just a brush application.
Bonus bonus tip: White Dove is a perfect neutral white for anything from baseboards to cabinets.
Tip Two: Find the Perfect Miter

An amazing tool, and only around $25.
Everyone knows that interior corners are never a perfect 90. I used to think there was nothing we could do about that, and that is why god invented caulk. Since I was about to tackle a hardwood baseboard installation and wouldn't be able to use any of that magic caulk, I needed to figure out what the big boys do to get a perfect corner joint.
It turns out the good people at Starrett figured it out for us. They made a simple tool that you wrap around your corner, and it tells you exactly what miter to cut. It even goes a step further and shows you one angle to cut for both pieces. So if it points at 46 degrees, you cut each corner at 46 degrees, and it will join up perfectly—no adding or subtracting anything. Go ahead and use your factory miter angles on your saw for the cuts. No, they aren't terribly accurate. But they are surprisingly good enough.
Tip Three: Measure in place
This is a lot easier with short pieces than with a full 16' section. I always try to bring my piece over to the wall and measure exactly where it needs to be cut, instead of relying on the inaccuracies of a tape measure.
Tip Four: Cut Long
Ok, not super long, but generally, add about 1/32" to any cut. 1/16" on the long runs. Due to the curvy nature of walls, most of the time, this little bit is absorbed when you nail it on and leaves for a nice tight fit. You'll often hear finish carpenters talk about "snapping a corner in."
Tip Four: Glue Outside Miters
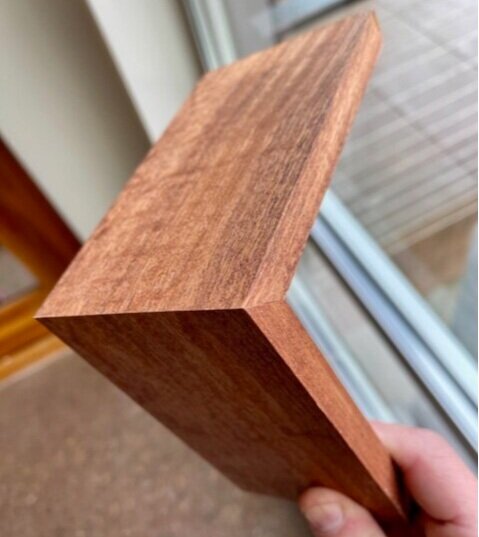
Perfect outside miter joint with CA glue.
This is my favorite tip. I don't know why this isn't on every HGTV show and carpentry hack youtube video, but it isn't. Once you cut your two outside miters and make sure they fit, then glue them together with CA glue and activator, also referred to as super glue. This stuff sets up in seconds and leaves a solid joint. I liked to dab a little on the inside edge of one miter (You don't want it to run out the front when you squeeze them together). Then I spray the other miter with the activator. You have about 5 seconds of working time, so you need to work fast. Just press them together, doing your best not to make your fingers a permanent part of the joint. If you did good, then your pieces have an invisible 90-degree miter joint. If you did bad and want to try again, you can break them apart with a little effort, scrape the glue off and repeat.
You would be surprised how much force this joint can take. I had some joints that didn't quite match the wall angle, and I could bend the baseboard back to the wall without breaking my perfect outside glue joint. Adding a small brad nail after gluing doesn't hurt to offer a little insurance either. I used 1.25" brads for what it is worth.
Tip Five: 18 gauge is all you need.
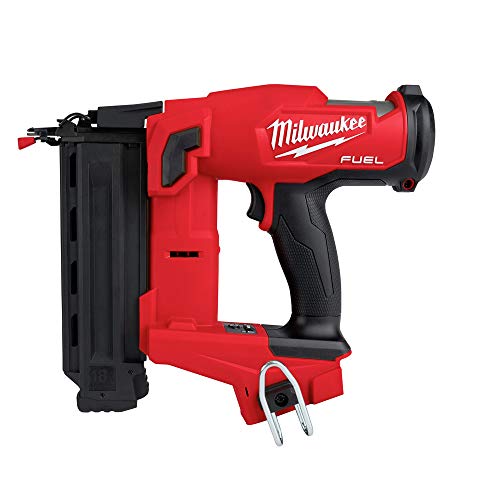
If you don't own a nail gun and only want to purchase the minimum required to complete the job, get yourself an 18 gauge brad nailer and call it good. I have a 15, 16, 18, 23 gauge, staple gun, and framing nailer. And the 18 gauge is what I reach for 95% of the time. Maybe even more than that. It delivers a nice small hole, takes brad nails up to 2" long (what I used on all my baseboards), as short as 5/8", and provides plenty of holding power for most small jobs.
Bonus tip: Treat yourself to a battery-powered brad nailer like the one I splurged on from Milwaukee. It wasn't cheap, but I was loving life just toting around a single gun. Vs. a gun, hose, and pancake compressor startling me every couple of minutes.
Tip Six: Sliding T Bevel For the Odd Angles
The Starrett miter angle tool is great at giving a very close estimate of what angle to cut. But since there are too many variables from the gauge, to your eye, then to your miter saw, It will always be an estimate.
A sliding T-bevel is different, though. For a base-to-case vertical transition that isn't a perfect 90, lock your T-bevel into whatever angle it is. Then transfer that angle to your miter saw by placing the thick end against your fence and move the blade towards your T-bevel until it touches. Now you have a perfect angle with no guessing. If that didn't quite make sense, you might want to watch my video on the process.
Tip Seven: Cope inside corners

This one doesn't make sense to a lot of people. It stands to reason that you could just cut two 45 degree miters and drop it in. The reason why you cope is a little more complicated than the fact that the inside corner is likely not a perfect 90. In my Youtube video, I asked if a finish carpenter could articulate what I couldn't and got a nice response from someone:
"Chicago Local 1 Finish Carpenter. You cope because it adds not only strength but as you show in the video over time with wood movement coped inside corners wont open up like you demonstrate on your 45 degree cut inside corner."
The jist of it is, inside miters will likely never line up perfectly, and even if they do, they will most likely open up over time.
So the alternative is to inside miters is coping. There are a number of ways to cope these inside corners. Traditionally finish carpenters would use an aptly named coping saw. I own a coping saw. I wanted to be proficient with a coping saw, I tried the coping saw, I just couldn't get a perfect fit. So I dug a little deeper into alternative coping methods. Eventually, I landed on the use of my Kutzall flame burr in my electric die grinder. My very first attempt with the Kutzall on a sample piece of MDF I was able to cope a corner good enough for any paint grade you will come across. With a little more practice, I could get tight joints on all my stain-grade corners.
The process for properly coping with a Kutzall burr is not complicated. Cut your base at a 45 on your miter saw. This exposes the contour you need to cope up to. Gently ease your Kutzall in and slowly carve towards the line. It can help to angle the cut slightly aft. This will keep the visible joint tight and keeps the back of the base from preventing a tight fit.
Old timers might mock you if you advertise this method. They will point out that they can use a coping saw upsidedown underwater and still get a fit that looks like the tree grew that way... Which is great for anyone that has 10,000 hours into coping. For the rest of us with just a couple hours, cheat your way to a perfect fit with the Kutzall.
Tip Eight: 45-degree end-to-end joints.
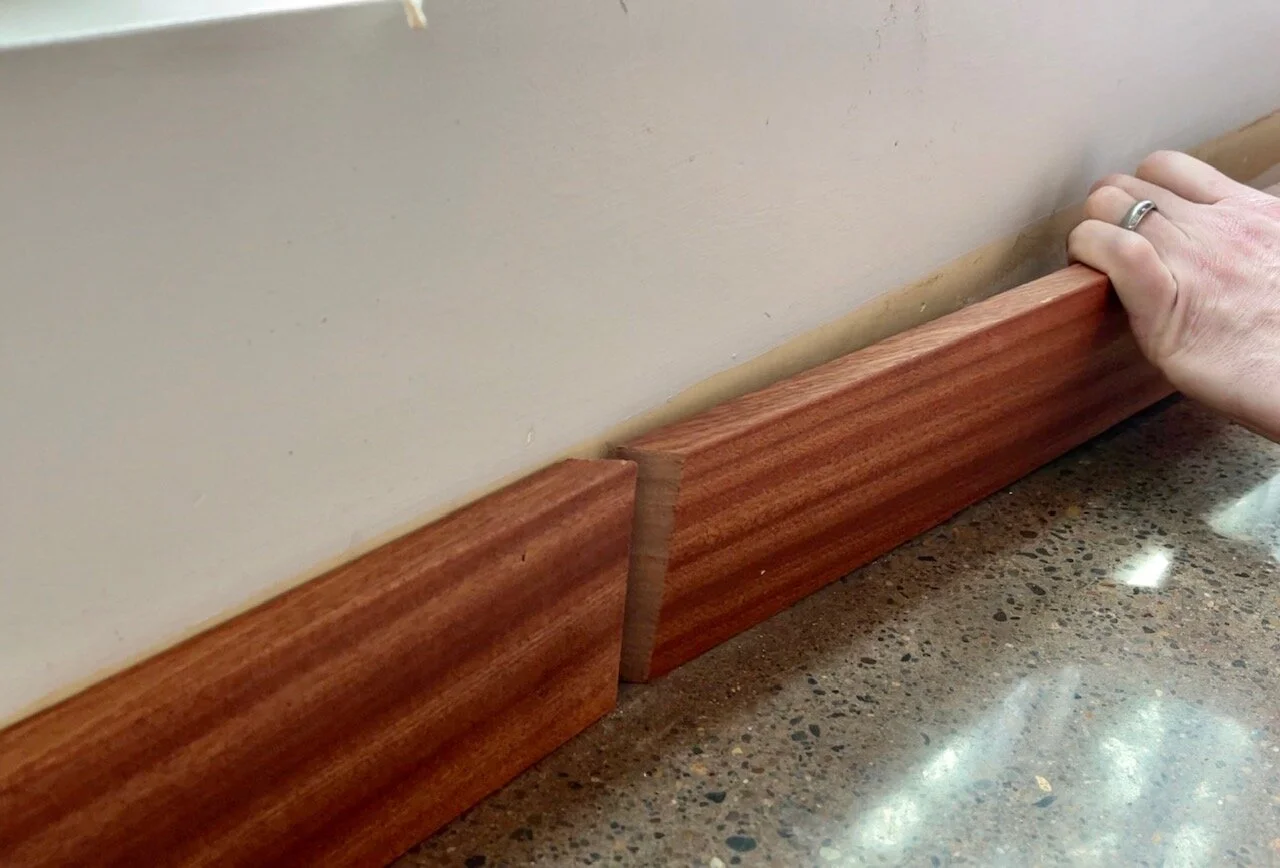
Before I get to this tip, I have to mention a requirement, not a tip. You must use 16' baseboards sections. Or as close to that as possible. Do not use 8' sections. Occasionally, I will be in someone's house where the DIY dad went and cobbled together new 'baseboards' from the door casing section in 8' lengths. The reason this looks so bad is that the end-to-end joints are often quite visible. And if someone didn't know enough to buy longer lengths, they probably didn't know enough to join them at 45-degrees. The alternative being 90-degree butt-joints. The reason is pretty simple. The 45-degree joint blends to nearly invisible if done correctly. And even if it isn't done perfectly, it still is barely noticeable from eye level. Where an end-to-end joint looks acceptable if done perfectly and atrocious if anything but perfect.
Most of us don't have more than a few walls that are longer than 16' continuous. For the walls longer than 16', cut the end of your base at a 45 before nailing it on. Then cut your next piece at the opposite 45 to continue the run.
Bonus tip: Survey the wall before nailing on your long pieces. You might find that if you run 16', your joint lands under a wall sconce that lights up the seam. OR if you run 13' (for example), your seam lands behind a recliner where it will never be seen—just something to think about when picking your long runs.
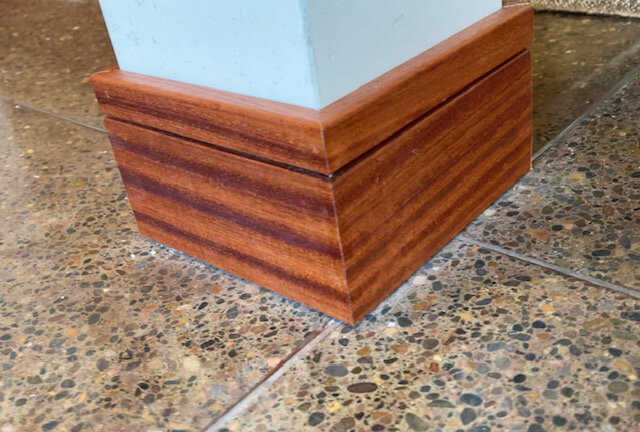
Tip Nine: Consider a Cap

Anyone who has attempted trim work knows the frustration of gaps behind your baseboards. This problem is usually remedied with copious amounts of caulk and paint. I know I have been guilty of this on many occasions. I knew that wasn't going to be an option with my new stain-grade baseboards, though. What was even worse is that our existing baseboards had gaps of up to almost 1/2" in some places due to the wandering/wavy walls.
The solution for me was two-pronged. First, our previous baseboards were 3/4" mahogany with very little flex. My new baseboards were going to be milled to 9/16". Which would not only flex to the wall much better but transition much nicer to the 3/4" vertical door casing. The second fix was to add a baseboard cap. A cap is a small, decorative piece of trim that "caps" off the baseboard. They come in a million shapes and sizes, and since they are smaller than the base they do an even better job of "hugging" the walls. Essentially eliminating any gaps.
The caps go on just like the baseboards. Which means you sort of double the work that needs to be done. Which isn't good for anyone. But for me, it was definitely worth it to have completely gap-free baseboards now.
Tip Ten: Filling nail holes
This is another tip that I shouldn't have to say, but first... Fill your nail holes even if you do it poorly. Only the trashiest of baseboards don't make any attempt to fill nail holes. If you are willing not only to accept that, but are willing to fill your nail holes properly, read on.
Unlike many tips here, the nail hole tips are not interchangeable from paint to stain-grade trim.
Paint grade:
Worst: The easiest and worst way to fill your nail holes is simply by smearing a dap of caulk in your nail hole. This is tempting because it is easy, and the white caulk even appears to match the white base. You might even think you can get away with not touching up the holes with more paint. There are a couple of problems with caulk, though. First, it shrinks. As it dries, it will pull back from the surface, revealing what looks like a little dimple in your base. The second problem is that if you don't touch up the caulk with paint, the fresh white will soon collect dust and look like a dingy smear that definitely doesn't match that white paint. All of that said, it looks better than not filling at all. But there are better options.
Better: The next best option isn't that bad at all. And that is to use wall spackle to fill the holes. Spackle is cheap, easy to use, doesn't shrink, and easy to repair if necessary. The best method I have found for using spackle is to press a small amount in and scrape off the excess with the back of a chisel. If you do it well, you won't have any spackle left other than directly in the hole. It dries in a few hours and easily sands if your filling was a little proud. Add a little touch-up paint, and you have a totally acceptable nail filler.
Best: I absolutely love using automotive Bondo for nail filler. However, it is slow to use, smells quite weird, and doesn't sand as easily as spackle. So why is it the best? Because it yields the best results. Bondo comes in two parts and reacts fairly quickly. So only mix up enough to be used in 2-3 minutes. The chisel method also works well for filling holes. But a Bondo spreader also works. The Bondo will be hard enough to sand in just 30 minutes or so, which is convenient for smoothing out any blemishes. Bondo sands extremely well and leaves a near glass-smooth finish when you're done. Unlike spackle, that kind of leaves a finish like if you were to sand a graham cracker. Bondo will never shrink and holds up to pretty moderate abuse.
Bonus tip: Consider filling larger gaps in outside miters with Bondo and touching up with paint. We don't always get that perfect joint, and sometimes we have to fake it. Just don't tell anyone.
Stain grade:
I tested many different nail fillers for my baseboards and found that the best results were from wax filling sticks. There are several different wax fillers, but the ones that worked best for me didn't require any heat to melt the stick first. Some of these sticks were designed to be used like a crayon. Where you just scribble over your hole to fill it. Then wipe off excess with a cloth rag. I didn't like this method for my natural-finish trim, though. This left a waxy halo around the nail hole that was almost more noticeable than the hole itself. I opted to use a tiny flathead screwdriver to scoop out a small amount. Then I would try and insert it directly into the hole. Any excess was scraped off with a small plastic scraper. The fillers come in a ton of different colors. Some of which were remarkably close to my trim. But I found I could get an even closer match by using a furniture marker to color in the nail hole if it was just a little too light.
Bonus tip: if you have a variation in color in your trim, try taking a dab of two colors, then pressing the mix into the nail hole. The variation can match the natural variation in wood if done correctly.
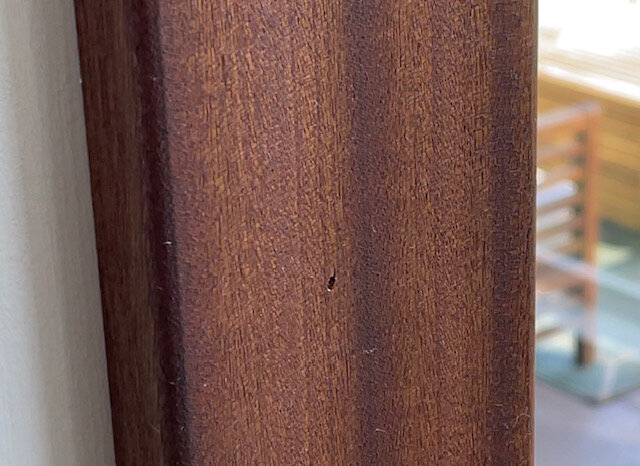
Nail hole before filling with wax filler
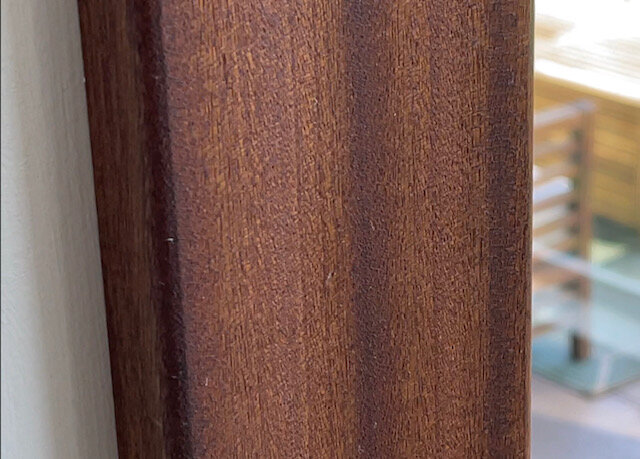
After wax filler
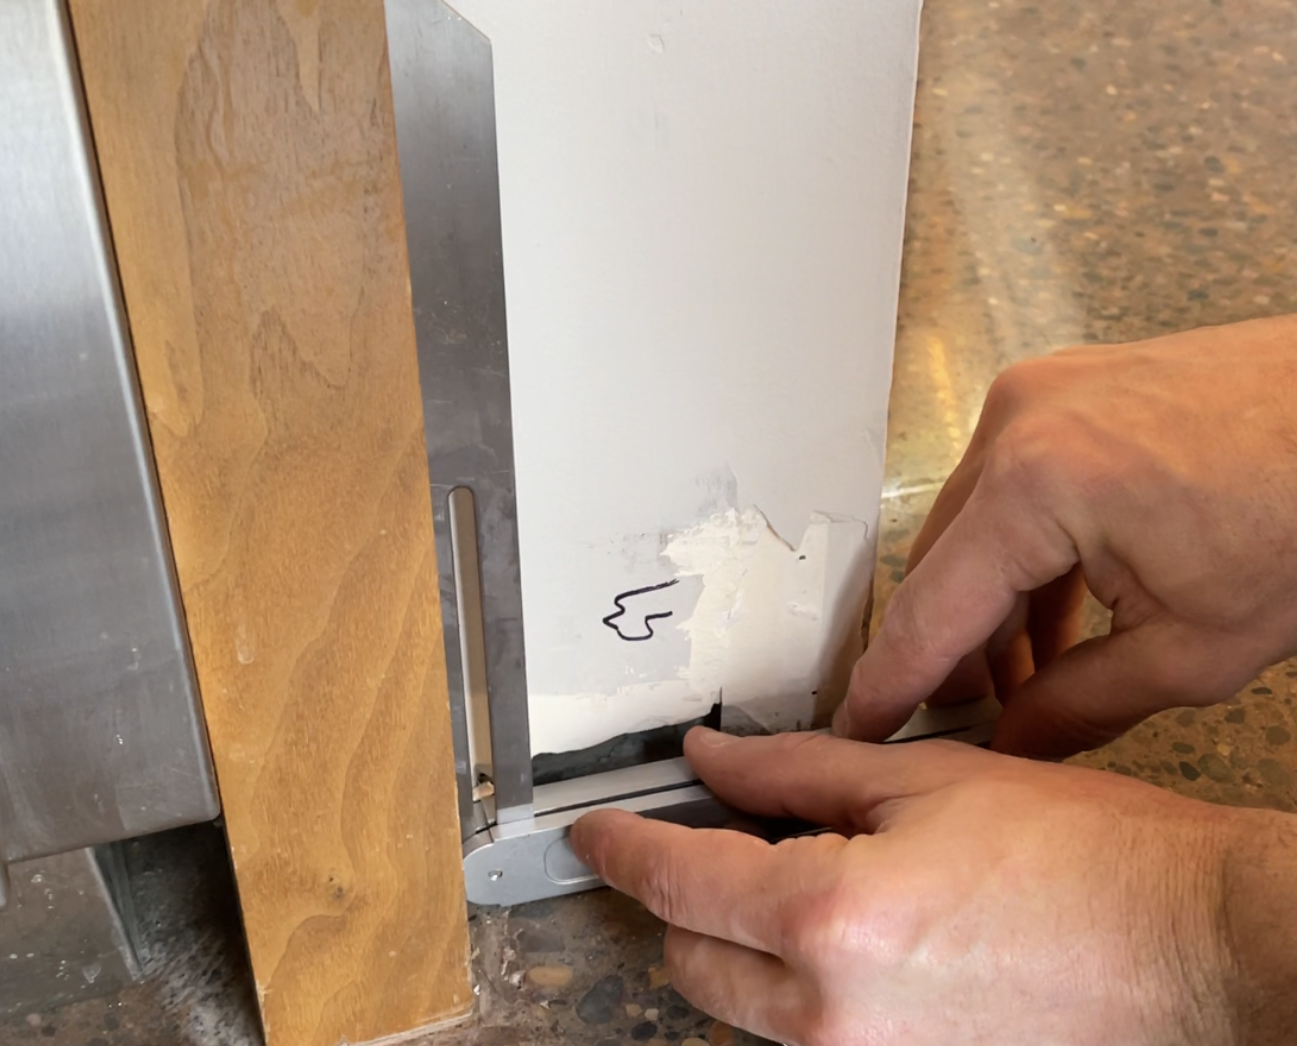
Painters tape trick:
I just saw Brad from Fix This Build That show a pretty neat trick that could potentially be used with either paint or stain grade baseboards. Before nailing on your base, add a piece of painter tape anywhere you will nail it to the wall. Then fill your holes without removing the tape. After they are filled, you can peel the tape off to reveal no excess filler smeared on your baseboard. I haven't tested this on my own baseboards yet, but it looks brilliant. A couple of potential downsides would be that you couldn't do a perfect job color-matching with stain grade. And I am not sure how smooth the hole would be in the end since the tape is a bit thicker. I would think that a light sanding would level it out nicely, though.
tip 11: Easing (or fixing) the outside miters
Internet people are often quick to say that they would never make a mistake and possess such skill that they had never even considered why someone might need to fix something as unsightly as a gap in the miters. For the rest of us that live in the real world, mistakes happen, and we need to know how to best camouflage them so that only your really annoying uncle will look close enough to point out the blemish.
This trick is surprisingly effective and equally easy. Just use something smooth, hard, and round (grow up). A screwdriver shaft works perfectly before you overthink this. Now close the gap by rolling the edges toward each other with the shaft of the screwdriver. You can close a pretty big gap this way if you have to. If the corner doesn't look quite right after rolling it closed, you can smooth it out with a little sandpaper or a fine file. I opted to ease all the corners in my house—even the ones with a perfect fit. A corner with a perfect 90 would not only be more prone to denting or chipping but would be extra brutal on a stubbed toe.

Closing up a decent sized gap
Nail holes filled and corners touched up with some more finish. Still dusty though.

Needs some touch up finish and some holes filled, but much better.